Monday 7 April 2014
Monday 31 March 2014
Coconut Cake with Swiss Meringue Buttercream
So to make up for my lack in blogging and decided I would bake something a little fancier and I had an abundance of coconut in the freezer! This cake turned out amazingly moist and delicious. A very subtle coconut flavour which I was actually surprised by seeing as I coated my pans with coconut oil, added coconut oil to the batter and used coconut milk! Whoa! I actually think my favourite and simplest part was the toasted sweetened coconut! So so tasty and the perfect add of crunch to go with all of the moist, sweet, creamy flavours and textures from the cake and buttercream!

Once my batter was mixed and my cakes had baked, I cooled them on drying racks for roughly an hour and then popped them into the fridge to cool while I whipped up a batch of Swiss Meringue Buttercream from Bakers Royale! It was my first time making it although it seamed to turn out great! I didn't bother to take pictures of the process because she has amazing ones on her blog! I quickly divided each cake into two and added a layer of buttercream between each and then followed with my crumb coat.


Coconut Cake with Swiss Meringue Buttercream
Yields two 9" cakes
3 cups all purpose flour
1 tbsp baking powder
1/2 tsp salt
2 eggs
2 egg yolks
1/2 cup unsalted butter (room temperature)
1/2 cup coconut oil
2 cups sugar
1 can coconut milk
1 tbsp vanilla
Method
1 tbsp baking powder
1/2 tsp salt
2 eggs
2 egg yolks
1/2 cup unsalted butter (room temperature)
1/2 cup coconut oil
2 cups sugar
1 can coconut milk
1 tbsp vanilla
Method
1. Preheat oven to 350 degrees
2. Prep two 9" cake pans; grease with coconut oil and flour
3. Sift flour and baking powder together
4. Cream together butter, coconut oil, sugar, eggs, vanilla & salt
5. Add dry ingredients to wet, alternating with coconut milk
6. Divide batter between pans and bake for 45 minutes
7. Cool 5 minutes then remove from pan and place on drying rack
8. Chill cakes prior to dividing layers and icing
Enjoy!
Monday 24 March 2014
Double Chocolate Caramel Filled Cake Batter Cookies
Now that name is a mouthful on its own! So much chocolatey goodness packed into one cookie and just when you think it can't get any better, a surprise chewy caramel centre!

The inspiration came from Sally's cake batter chocolate chip cookies! The idea of using cake batter in a cookie is absolutely brilliant!!! Let's face it, who doesn't love cake batter?!?! Even better, I am an absolute chocolate lover so why not use chocolate cake mix! So I started brainstorming...
I originally decided on triple chocolate cake batter cookies (which I will eventually do a recipe for) - they were basically the same as the ones I ended up making but instead of having a caramel centre, they would have had a gooey chocolate centre! I didn't have any chocolate wafters on hand but I did have caramels left over from the homemade turtles I didn't get to this past Christmas! So that was the deciding factor on what kind of cookies I would be making!
The 'original' cookie batter was made on FRIDAY! That's right, FRIDAY... 4 days ago! So... here goes the story, mixed up the batter... then I wanted to let it chill for at least 2 hours (so I did), then I rolled out my cookies using Sally's tall cookie trick (OMG, this woman is brilliant, just like her baking). EPIC FAIL is all I can say, it was like one big flat cookie. Needless to say I was not impressed and slightly disgruntled. So, I decided to put my cookie batter in the fridge overnight? Again, another fail in the morning - not quite as bad as the first but still terrible. Then I got interrupted, my dad was having a big breakfast with friends from Sudbury, so back into the fridge the cookie batter went and off to dad's house we went! ... 10 hours later we made it home, lol! FINALLY I would attempt these cookies one last time in hopes that they would be a success. Again, they failed. I was heart broken. I studied hard, took my time writing the recipe and deciding on what ingredients would be used and how much and theoretically, they should have worked so what happened? I was completely confuzzled.
Then... OH MY GOD! As I was going over the steps in my head from when I mixed up my batter, I realized that I DOUBLED, yes, DOUBLED the amount of butter I used in my recipe!! I couldn't believe it! But at least now I knew why no matter how much chill time or how TALL I made those cookies, they just would never work!
So... I decided to mix up another batch! But, of course, my butter was cold so I cubed it to bring it up to room temperature while I bathed and put Leo to bed.

I sifted the dry, creamed the wet, and added the chocolate chips.

Then the batter went into the fridge overnight to chill, this momma was ready to SLEEP! I woke up the next morning and the first thing I did was preheat my oven and cut the caramels in half.

Then I rolled out a perfect 12 tall cookies and into the oven they went in batches of 6 (I didn't want to overcrowd and we only have a small apartment sized stove)! They baked for exactly 12 minutes and out they came, finally, a success!


Double Chocolate Caramel Filled Cake Batter Cookies
Method
The inspiration came from Sally's cake batter chocolate chip cookies! The idea of using cake batter in a cookie is absolutely brilliant!!! Let's face it, who doesn't love cake batter?!?! Even better, I am an absolute chocolate lover so why not use chocolate cake mix! So I started brainstorming...
I originally decided on triple chocolate cake batter cookies (which I will eventually do a recipe for) - they were basically the same as the ones I ended up making but instead of having a caramel centre, they would have had a gooey chocolate centre! I didn't have any chocolate wafters on hand but I did have caramels left over from the homemade turtles I didn't get to this past Christmas! So that was the deciding factor on what kind of cookies I would be making!
The 'original' cookie batter was made on FRIDAY! That's right, FRIDAY... 4 days ago! So... here goes the story, mixed up the batter... then I wanted to let it chill for at least 2 hours (so I did), then I rolled out my cookies using Sally's tall cookie trick (OMG, this woman is brilliant, just like her baking). EPIC FAIL is all I can say, it was like one big flat cookie. Needless to say I was not impressed and slightly disgruntled. So, I decided to put my cookie batter in the fridge overnight? Again, another fail in the morning - not quite as bad as the first but still terrible. Then I got interrupted, my dad was having a big breakfast with friends from Sudbury, so back into the fridge the cookie batter went and off to dad's house we went! ... 10 hours later we made it home, lol! FINALLY I would attempt these cookies one last time in hopes that they would be a success. Again, they failed. I was heart broken. I studied hard, took my time writing the recipe and deciding on what ingredients would be used and how much and theoretically, they should have worked so what happened? I was completely confuzzled.
Then... OH MY GOD! As I was going over the steps in my head from when I mixed up my batter, I realized that I DOUBLED, yes, DOUBLED the amount of butter I used in my recipe!! I couldn't believe it! But at least now I knew why no matter how much chill time or how TALL I made those cookies, they just would never work!
So... I decided to mix up another batch! But, of course, my butter was cold so I cubed it to bring it up to room temperature while I bathed and put Leo to bed.
I sifted the dry, creamed the wet, and added the chocolate chips.
Then the batter went into the fridge overnight to chill, this momma was ready to SLEEP! I woke up the next morning and the first thing I did was preheat my oven and cut the caramels in half.
Then I rolled out a perfect 12 tall cookies and into the oven they went in batches of 6 (I didn't want to overcrowd and we only have a small apartment sized stove)! They baked for exactly 12 minutes and out they came, finally, a success!
Double Chocolate Caramel Filled Cake Batter Cookies
Yields 2 dozen cookies
1 1/4 cups all purpose flour
1 1/4 cups boxed chocolate cake batter mix
1 tsp baking powder
1/2 tsp baking soda
1/4 tsp salt
3/4 cup butter (room temperature)
1 egg
1 cup dark brown sugar
1 tsp vanilla
1 cup chocolate chips
12 caramels (cut in half to make 24)
1 1/4 cups boxed chocolate cake batter mix
1 tsp baking powder
1/2 tsp baking soda
1/4 tsp salt
3/4 cup butter (room temperature)
1 egg
1 cup dark brown sugar
1 tsp vanilla
1 cup chocolate chips
12 caramels (cut in half to make 24)
Method
1. Sift together flour, cake mix, baking powder and baking soda
2. Cream butter, sugar, egg, vanilla and salt in stand mixer
3. Add and mix in dry ingredients
4. Add and mix in chocolate chips
5. Cover with plastic wrap and chill in fridge at least 2 hours
6. Preheat oven to 350 degrees and line baking sheet with parchment
7. Cover caramel piece with roughly 1 1/2 - 2 tbsp batter
8. Bake 8-12 minutes
9. Let cook 5 minutes then move to cooling rack
Note: Cookies will appear 'puffy' but will set once cool
Enjoy!
Thursday 20 March 2014
Earl Grey & White Chocolate Chip Cookies
I absolutely love Earl Grey!
These cookies are my own recipe & I have to admit I was hesitant to share because there are still alterations that need to be made. Although my family loved them, they love everything I make and are by no means cookie connoisseurs!
Anywho, mix up a batch and give them a try!
Happy baking!


Earl Grey & White Chocolate Chip Cookies
Method
These cookies are my own recipe & I have to admit I was hesitant to share because there are still alterations that need to be made. Although my family loved them, they love everything I make and are by no means cookie connoisseurs!
Anywho, mix up a batch and give them a try!
Happy baking!
Earl Grey & White Chocolate Chip Cookies
Yields 3 dozen cookies
1/2 cup butter
1/2 cup coconut oil
1 egg
1 tsp vanilla
Pinch of salt
1/2 cup white sugar
2 Earl Grey tea bags
1 tsp baking powder
1 tsp baking soda
2 cups all purpose flour
1 cup white chocolate chips
1/2 cup coconut oil
1 egg
1 tsp vanilla
Pinch of salt
1/2 cup white sugar
2 Earl Grey tea bags
1 tsp baking powder
1 tsp baking soda
2 cups all purpose flour
1 cup white chocolate chips
Method
1. Preheat oven to 350 degrees and line baking sheet with parchment paper
2. Mix butter, coconut oil, egg, sugar, vanilla and salt
3. Mix in flour, baking soda, baking powder and tea powder
4. Add white chocolate chips
5. Spoon tsp size batter onto cookie tray
6. Bake for 8-10 minutes or until bottoms lightly browned
Enjoy!
2. Mix butter, coconut oil, egg, sugar, vanilla and salt
3. Mix in flour, baking soda, baking powder and tea powder
4. Add white chocolate chips
5. Spoon tsp size batter onto cookie tray
6. Bake for 8-10 minutes or until bottoms lightly browned
Enjoy!
Wednesday 19 March 2014
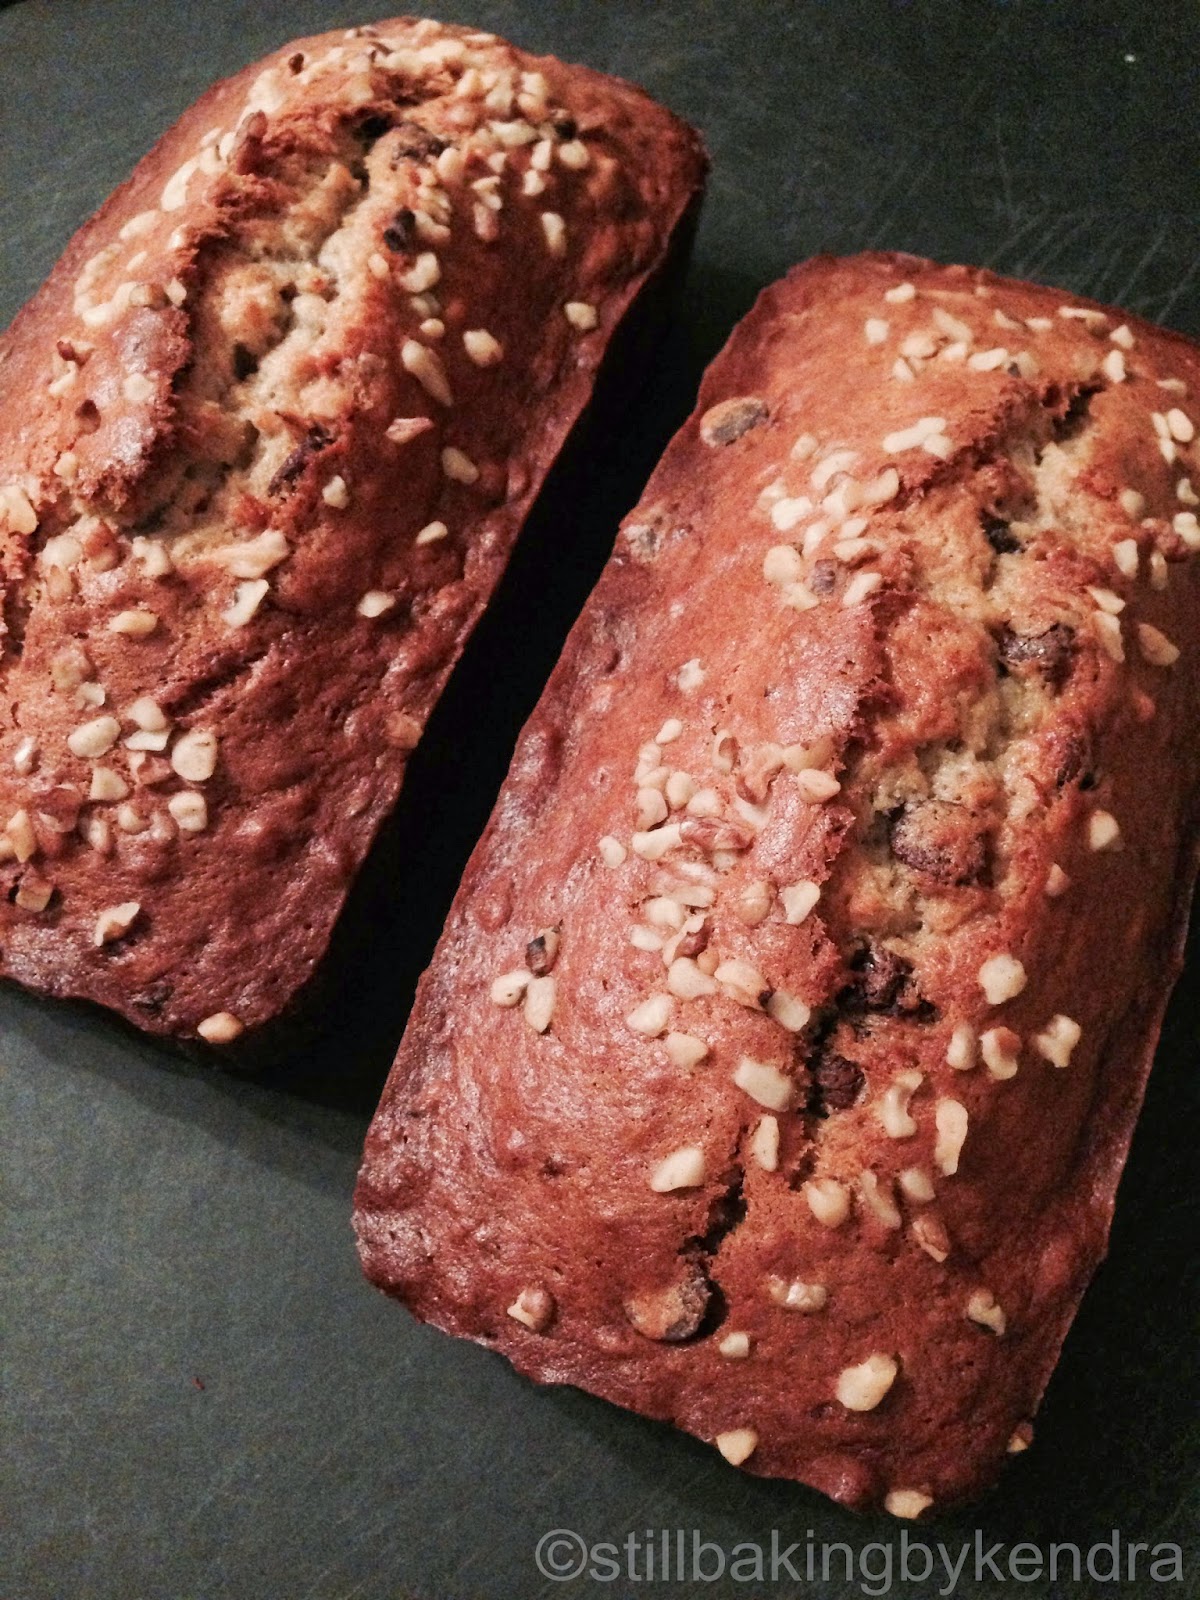
Banana Bread for Boys
Well, we are expecting a mix of weather for today: rain, freezing rain, ice pellets and snow. That doesn't stop them though, Bee and my dad are determined to go ice fishing with their buds today. Just incase the weather cooperates, I thought I would bake them something yummy to warm their tummies out on the ice.

I actually made this last night but I was too tired to add the pictures to my post and everyone knows, pictures are key!
Originally I wanted this banana bread to be healthy-ish; buttermilk, whole wheat and maybe some apple sauce, etc etc! I spent the evening looking at recipes I have used in the past and others using buttermilk debating which one I would use but one would have too much sugar, no buttermilk, there just wasn't really anything with exactly what I wanted so I decided to pick one and do some substitutions/additions! This was the original recipe I was going to follow: banana chocolate chip buttermilk bread. In the end, what I did was nowhere close to this but I thought I should give credit where credit deserved! I will have to try out the buttermilk recipe I came up with another time!

Wishing the boys the best of luck out on the ice today. Hopefully we can have fresh fish tonight for dinner. Until then, I am staying toasty warm indoors with Leo and Dash!
& I hope you all give my banana bread a chance and let me know what you think or if you did any substitutions of your own!
Happy Baking!
Banana Bread
Yields 2 loaves
2 eggs
1 cup sugar
1/2 cup melted butter
1 tsp vanilla
Pinch of salt
2 cups all purpose flour
1 tsp baking soda
3 mashed bananas
1/2 cup walnuts
1/2 cup chocolate chips
Method
1. Preheat oven to 350 degrees and prepare 2 loaf pans
2. Mix eggs, sugar, vanilla and salt
3. Mix flour and baking soda, add to wet mixture
4. Add bananas, mix to combine
5. Fold in nuts and chocolate chips
6. Bake for 50 minutes
Enjoy!
2. Mix eggs, sugar, vanilla and salt
3. Mix flour and baking soda, add to wet mixture
4. Add bananas, mix to combine
5. Fold in nuts and chocolate chips
6. Bake for 50 minutes
Enjoy!
Monday 17 March 2014
Pavlovas, Whipped Cream & Fresh Fruit
Another BEAUTIFUL and DELICIOUS dessert!
We had our neighbour over for dinner tonight and because we were having such a heavy dinner (moose meat lasagna w greek salad & garlic bread), I thought this would be the perfect light&fluffy dessert to end the evening! I was right & it was loved - nothing but compliments and requests to have it again!!

Although, it was my first time attempting a pavlova they turned out fairly well. The actual Pavlova itself did brown a tiny bit which I think was a result of cooking them at 300 degrees (I think next time I will bake them at 200 degrees instead).
Pavlovas are rather simple to make - I'm sure I will say that about any dessert after the love/hate relationship I have had w french macarons over the past few months... although, I do believe I have finally mastered them (post, recipe & ranting to come)!!
Soooo... first things first, I whipped my egg whites & sugar! This has always been one of my favourite things to do when baking because to me, it's one of the easiest! I am always able to make those beautiful glossy peaks, whether they be used for a lemon meriangue pie, french macarons or in todays case, pavlovas! Once the stiff peaks were made, I quickly added the vinegar and vanilla.
This is another step I am undecided about: white vinegar versus cider vinegar? Which to use and why? If anyone has some insight, please share! I would love some opinions before I make these again! I ended up using the cider because I was following the recipe for these Summer Fruit Pavlovas and that's what it called for!


As stated earlier, I decided to bake the pavlovas at 300 degrees for 1 hour. I think this is too high if you want to have those perfect white pavlovas which I did not - they were still great but they were a dark beige, light brown sort of colour. Anywho, add your whipped cream and fresh fruit and you're done!

Pavlovas, Whipped Cream & Fresh Fruit
Pavlovas
Whipped Cream
Method
Recipe adapted from Farmhouse Table
We had our neighbour over for dinner tonight and because we were having such a heavy dinner (moose meat lasagna w greek salad & garlic bread), I thought this would be the perfect light&fluffy dessert to end the evening! I was right & it was loved - nothing but compliments and requests to have it again!!
Although, it was my first time attempting a pavlova they turned out fairly well. The actual Pavlova itself did brown a tiny bit which I think was a result of cooking them at 300 degrees (I think next time I will bake them at 200 degrees instead).
Pavlovas are rather simple to make - I'm sure I will say that about any dessert after the love/hate relationship I have had w french macarons over the past few months... although, I do believe I have finally mastered them (post, recipe & ranting to come)!!
Soooo... first things first, I whipped my egg whites & sugar! This has always been one of my favourite things to do when baking because to me, it's one of the easiest! I am always able to make those beautiful glossy peaks, whether they be used for a lemon meriangue pie, french macarons or in todays case, pavlovas! Once the stiff peaks were made, I quickly added the vinegar and vanilla.
This is another step I am undecided about: white vinegar versus cider vinegar? Which to use and why? If anyone has some insight, please share! I would love some opinions before I make these again! I ended up using the cider because I was following the recipe for these Summer Fruit Pavlovas and that's what it called for!
Now onto making the little pavlova nests. I did make a poor judgement call on my part when it came to adding the cream of tartar, I decided not to, when I should have. It helps stabilize your peaks, especially during cook time. I'm not sure why I decided not to, I just didn't. My nests did turn out fairly well though, thank goodness!
Pavlovas, Whipped Cream & Fresh Fruit
Yields 6 pavlovas with 4" diameter
Pavlovas
4 egg whites
3/4 cup sugar
1 tbsp sugar
2 tsp cornstarch
1 tsp vanilla
1 tsp cider vinegar
3/4 cup sugar
1 tbsp sugar
2 tsp cornstarch
1 tsp vanilla
1 tsp cider vinegar
Whipped Cream
1 cup whipping cream
3 tbsp icing sugar
1 tsp vanilla
3 tbsp icing sugar
1 tsp vanilla
Method
1. Whip egg whites until soft peaks form, add sugar and whip until stiff peaks form. In separate dish, mix 1 tbsp sugar and cornstarch then add and whip with the meringue. Then quickly add vinegar and vanilla, whip only until combined.
2. Line baking sheet w parchment paper and spoon meringue. Use back of spoon to create nest shape.
3. Bake at 200 degrees for 1 hour. When baking time completed, turn off oven and leave pavlovas inside to cool gradually to room temperature (roughly 1 hour).
4. Whip the whipping cream until soft peaks form. DO NOT over whip!!! Once whipped, add icing sugar and vanilla and whip in quickly until combined.
5. Top pavlovas with whipping cream and the fresh fruit of your choice!
Enjoy!
Recipe adapted from Farmhouse Table
Sunday 16 March 2014
Apple Cinnamon Whole Wheat Hand Pies
First of all, these little pies are so super cute (& delish)! I was absolutely smitten when they turned out!

When I first decided to make these I hadn't planned on making whole wheat pie crust but when I went to make my pastry, I realized that I was almost out of all purpose flour (btw, who runs out of flour when you bake as much as I do! LOL) Anywho, I had some whole wheat flour though, so... whole wheat pastry it is! The same deal w my filling - the only thing I had on hand that wasn't frozen was mac apples (not my usual choice for an apple pie filling but whatever!)
Apple Cinnamon Whole Wheat Hand Pies
Filling
Pastry
Method
Recipe adapted from Chef Michael Smith
When I first decided to make these I hadn't planned on making whole wheat pie crust but when I went to make my pastry, I realized that I was almost out of all purpose flour (btw, who runs out of flour when you bake as much as I do! LOL) Anywho, I had some whole wheat flour though, so... whole wheat pastry it is! The same deal w my filling - the only thing I had on hand that wasn't frozen was mac apples (not my usual choice for an apple pie filling but whatever!)
I started by making my filling; apples, brown sugar, cinnamon and a bit of flour!

After that I mixed up my favourite and I think, the easiest, pastry recipe Chef Michael Smith old fashioned apple pie crust. Although I did adapt it because of the whole wheat flour debacle! Once I had my pastry made&rested I rolled it, cut it and added my filling!

Then I assembled! I wet the edges w some water and then sealed them w a fork. They look a little uneven before baking but when they were done they rounded out beautifully! Yay!

Then bake for 25-30 minutes at 350!
Note: I didn't use an egg wash but you could always add it before baking. Personally, I think the crust is a pretty colour already without adding it!

Then I assembled! I wet the edges w some water and then sealed them w a fork. They look a little uneven before baking but when they were done they rounded out beautifully! Yay!
Then bake for 25-30 minutes at 350!
Note: I didn't use an egg wash but you could always add it before baking. Personally, I think the crust is a pretty colour already without adding it!
Apple Cinnamon Whole Wheat Hand Pies
Yields 6 hand pies with 4" diameter
Filling
3 macintosh apples
1/4 cup brown sugar
1/2 tsp cinnamon
1/2 tbsp all purpose flour
1/4 cup brown sugar
1/2 tsp cinnamon
1/2 tbsp all purpose flour
Pastry
1 1/2 cups all purpose flour
1 cup whole wheat flour
2 tbsp sugar
1 cup butter (cold or frozen)
3/4 cup cold water
1 cup whole wheat flour
2 tbsp sugar
1 cup butter (cold or frozen)
3/4 cup cold water
Method
1. Mix your filling first; peel and dice your apples, add ingredients and then let sit until your ready to fill your pies
2. Mix dry ingredients for pastry together. Grate in your butter using a box grater or whatever you have. Gently mix with fingers so butter is equally distributed. Then add water. Begin kneading until dough comes together. Wrap w plastic wrap and refrigerate for 1/2 hour or so. (Note: I divide my dough into two, I find it esier to roll out smaller chunks and to portion easier when it is time to do your cut outs
3. Lightly flour surface and roll out dough. Cut out your rounds.
4. Divide filling evenly. Wet edges of pastry w water and add top. Use your fork to seal the edges. If they don't completely stick together, that's okay - they'll come together as they are baking! Score the top of your pastry to allow for steam to escape. (If you are going to use an egg wash - now would be the time to apply it!)
5. Line baking sheet w parchment paper and space pies evenly. Bake for 25-30 minutes. Time may vary depending on oven temperatures.
Enjoy!
Recipe adapted from Chef Michael Smith
Subscribe to:
Posts (Atom)